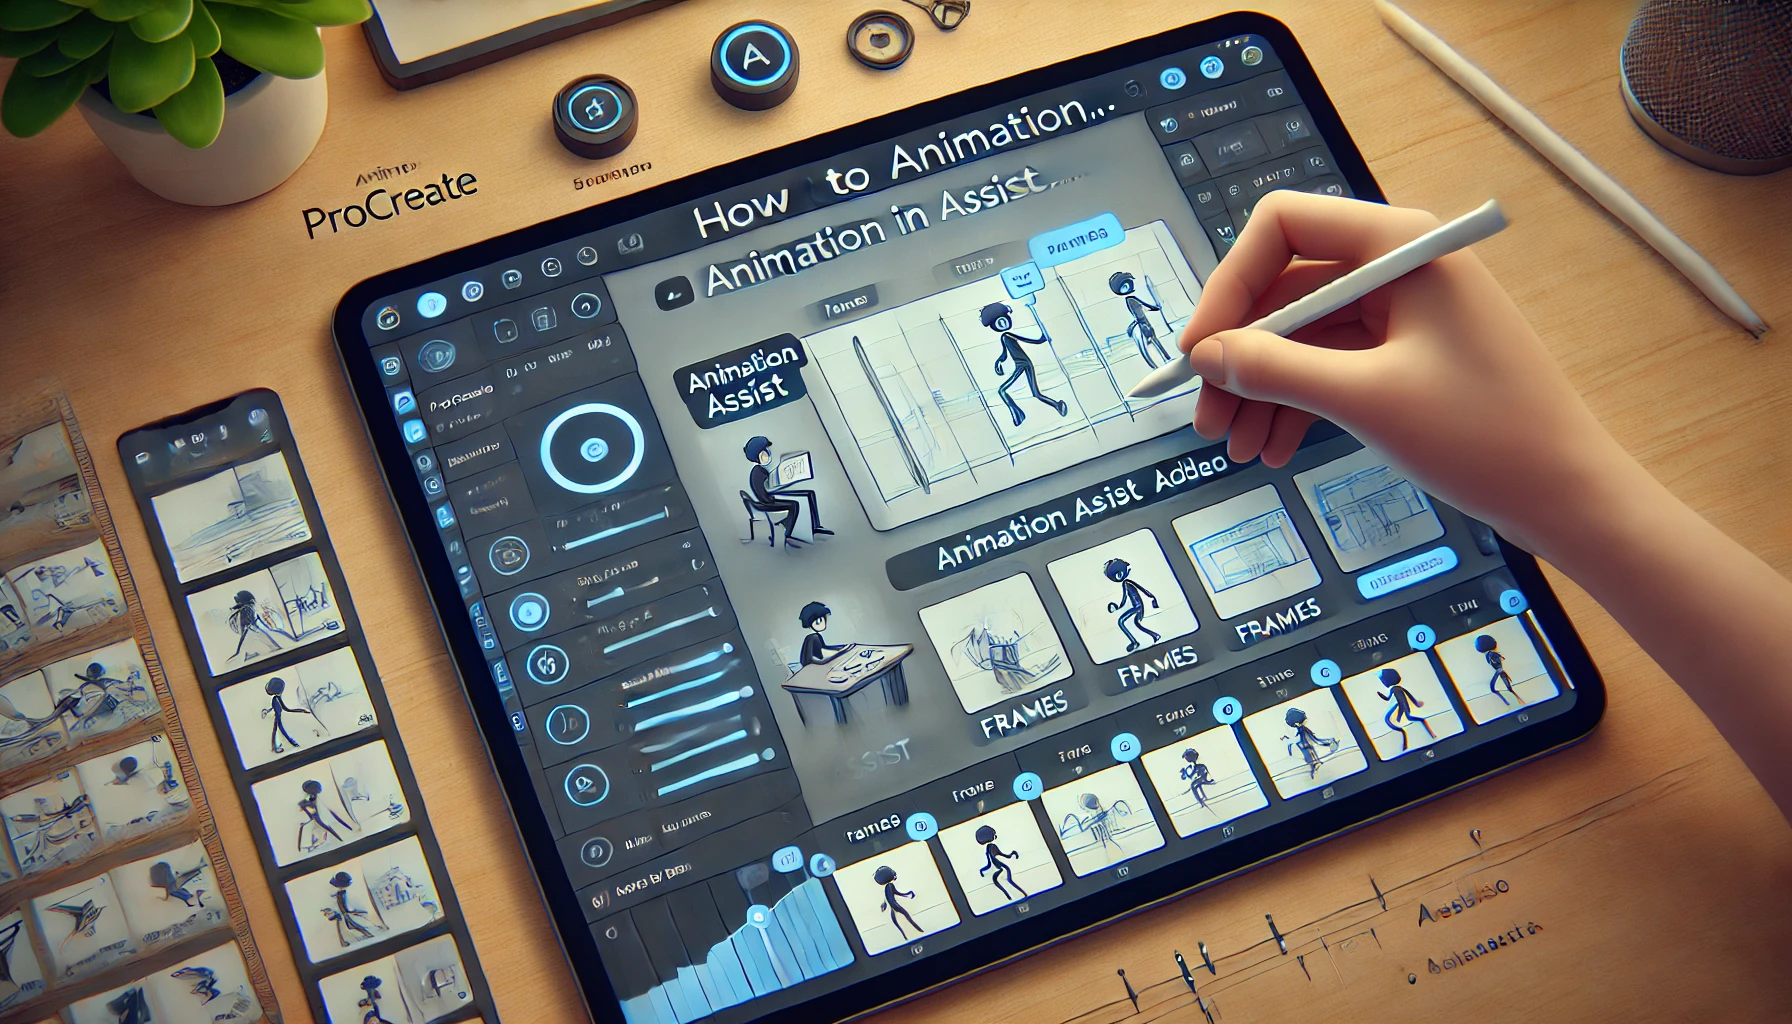
How to Animate in Procreate: A Beginner’s Guide
Are you interested in learning how to animate in Procreate? Procreate is a popular digital drawing app available for iPhone and iPad, known for its powerful features, especially for creating illustrations. But did you know that you can also use it to create simple animations? With a bit of practice, mastering how to animate in Procreate could even pave the way for a career in professional animation.
In this guide, we’ll walk you through the basic steps of how to animate in Procreate, giving you the tools to start creating your own animations. Whether you’re new to animation or just exploring Procreate’s capabilities, this tutorial will help you get started with simple yet effective animation techniques.
By following these steps, you’ll learn how to set up your canvas, create frames, and bring your drawings to life with movement. Ready to dive into how to animate in Procreate? Let’s get started!
Part1 Creating an Animation

How to Create an Animation in Procreate: Step-by-Step Guide
Want to create an animation in Procreate? Here’s a detailed guide to help you get started with basic animation in this popular app.
Step 1: Open a New Canvas
Start by opening the Procreate app on your iPhone or iPad. Tap an existing canvas from the Gallery, or tap the plus (+) icon in the upper-right corner to create a new canvas. Select the canvas size you prefer to work with.
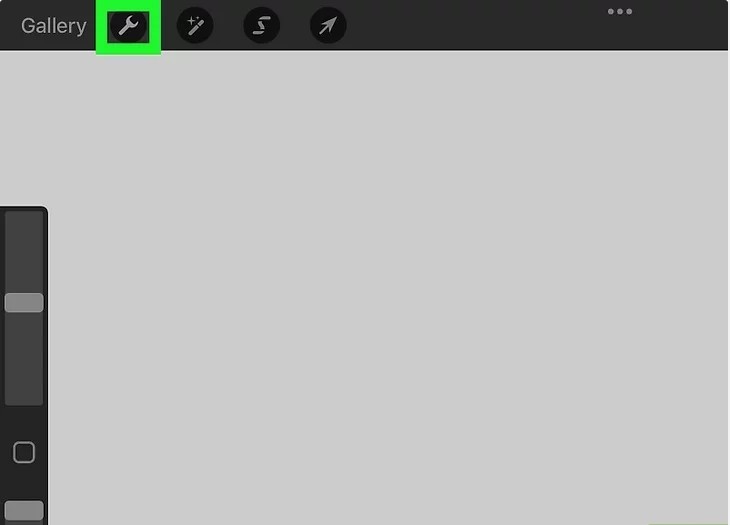
Step 2: Tap the Wrench Icon
Next, tap the wrench icon located in the upper-left corner of the screen, near the “Gallery” label. This will open the Actions menu.
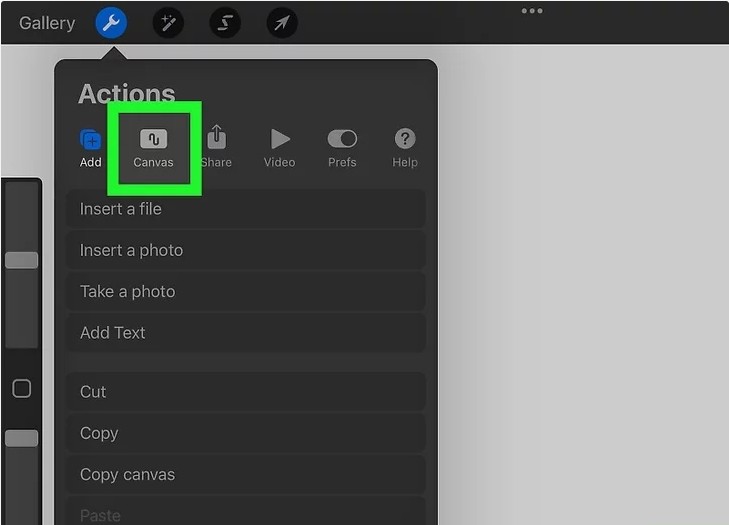
Step 3: Tap Canvas
In the Actions menu, tap the “Canvas” icon, which looks like a screen with a curvy line on it. This is the second tab at the top of the Actions menu.
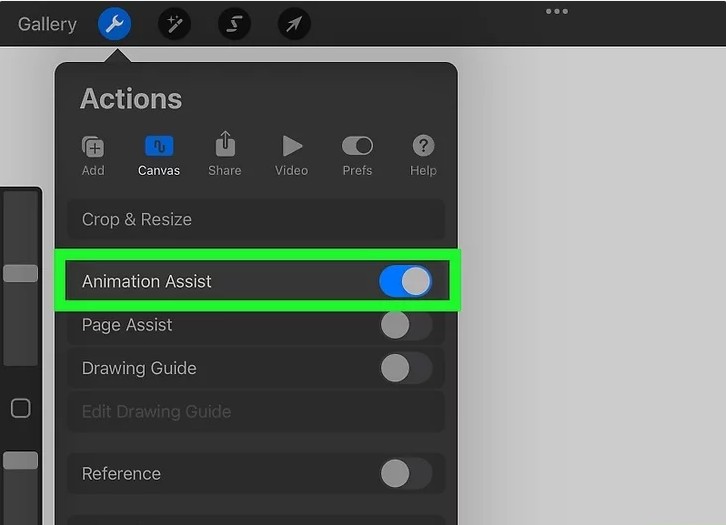
Step 4: Toggle on “Animation Assist”
Under the “Canvas” section, toggle on the Animation Assist option. This will activate the timeline at the bottom of the screen, making it easier to manage your frames.
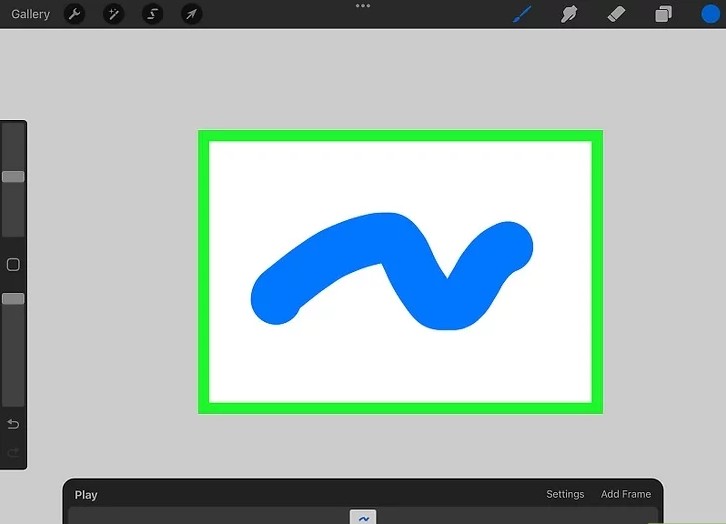
Step 5: Draw Your First Frame
Now it’s time to start drawing. Use Procreate’s drawing tools to create the first frame of your animation. Treat this like any other drawing.

Step 6: Tap Add Frame
Once your first frame is complete, tap the Add Frame button located at the far-right side of the timeline. This action will create a new frame for your animation.
Alternatively, you can add frames by using layers. If you’re working with multiple objects in your animation, group the layers to treat them as a single frame.
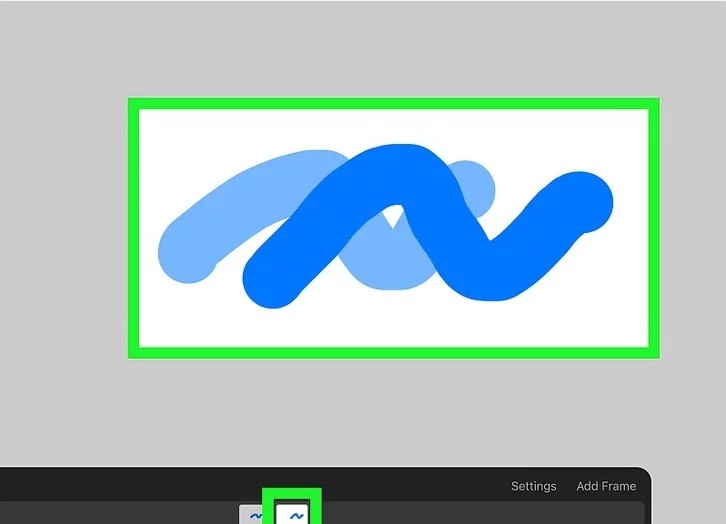
Step 7: Draw Your Next Frame
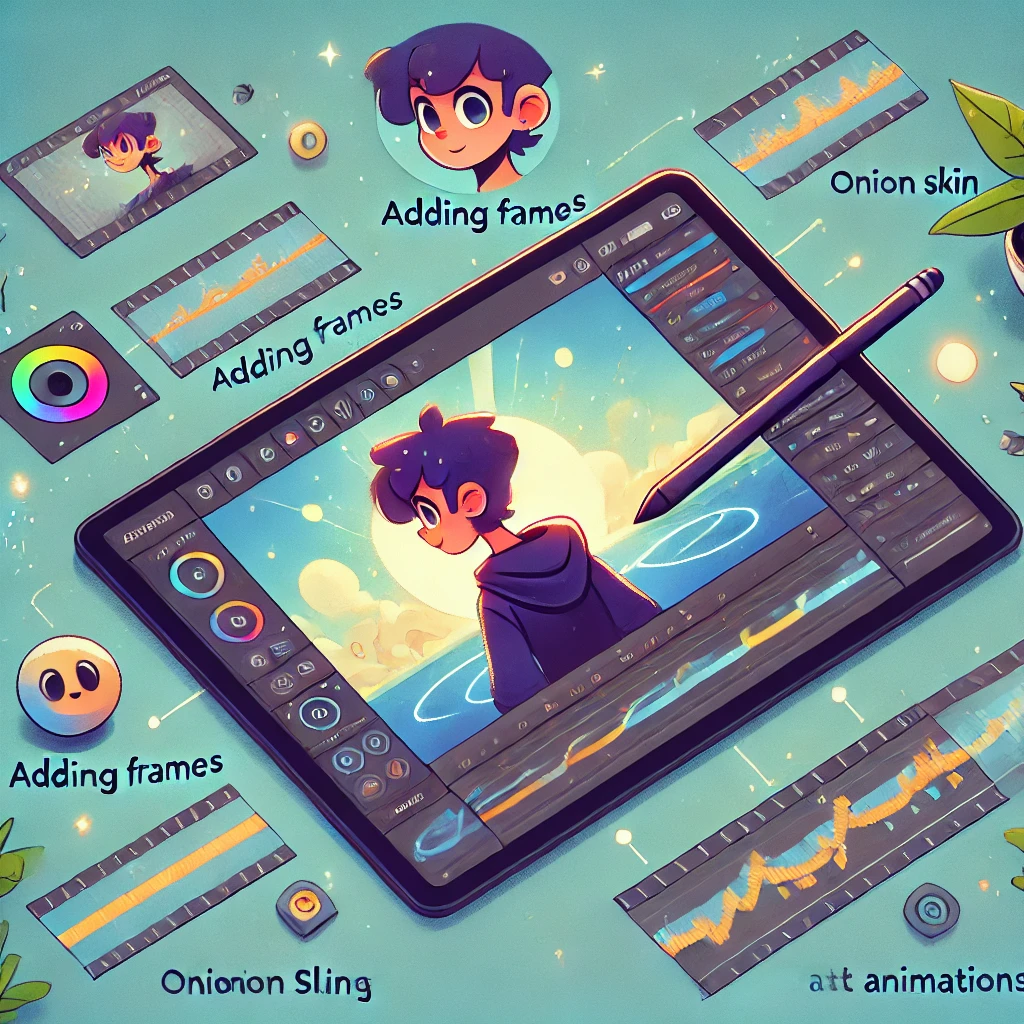
Tap the second white square in the timeline to select the second frame. Begin drawing your second frame on the canvas. You’ll notice a faint outline of the previous frame, called the “onion skin,” which can be used as a reference while drawing your next frame.
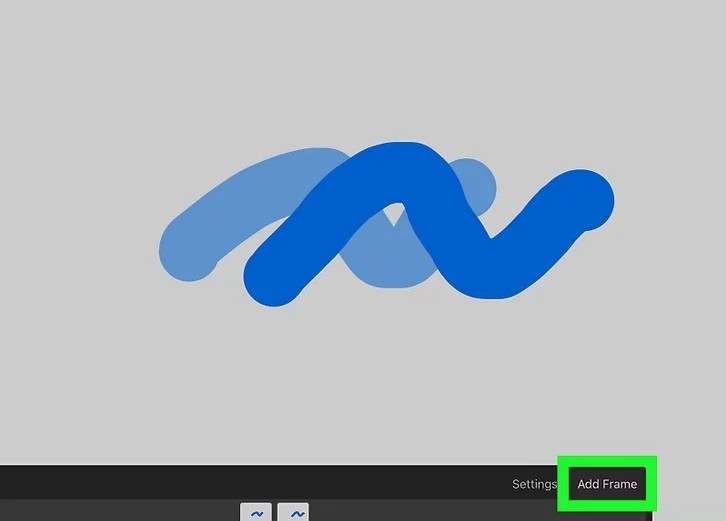
Step 8: Add More Frames
To continue building your animation, tap Add Frame again and draw the next frame. Keep repeating this process, adding frames until your animation is complete.
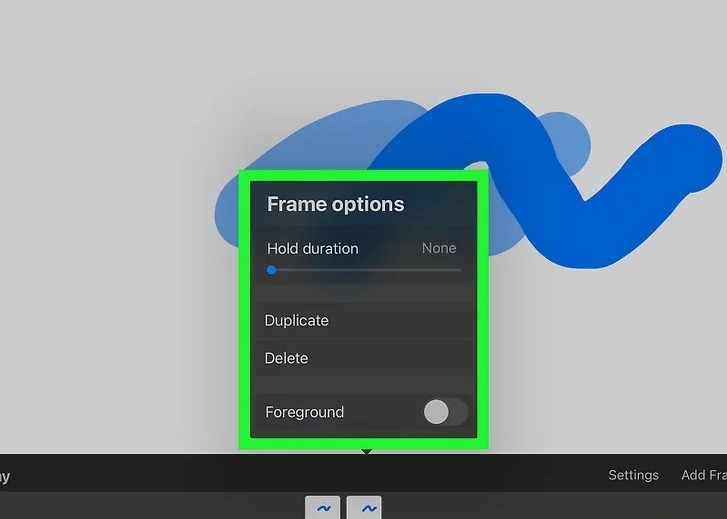
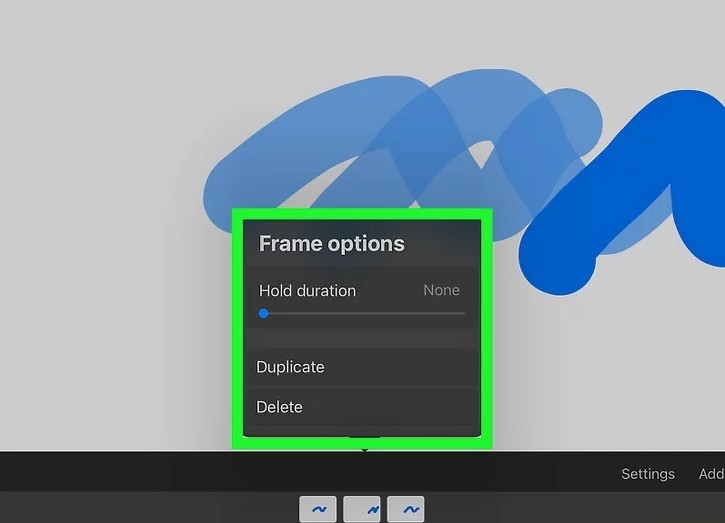
Step 9: Open the Frame Options Menu
Tap a frame in the timeline, then tap it again to open the Frame Options menu. From here, you can adjust settings such as the timing between frames.
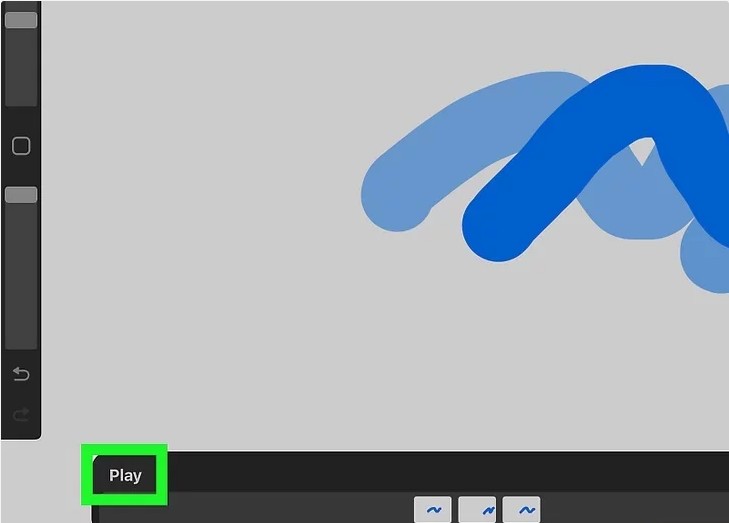
Step 10: Tap Play to Preview
When you’re ready to preview your animation, tap the Play button located on the left side of the timeline. This will allow you to see how your frames flow together and preview your animation in real time.
By following these steps, you can create a simple animation in Procreate, bringing your drawings to life! For more advanced techniques and additional features, be sure to explore Procreate’s full animation tools.
References:
- Procreate’s official website: Procreate
- Animation tutorial on Procreate: How to Animate in Procreate
Part2 Adjusting the Settings and Options
How to Adjust Animation Settings in Procreate: Step-by-Step Guide
If you’re looking to fine-tune your animation in Procreate, adjusting the frame options and animation settings is key. Here’s how you can customize your animation experience.
Step 1: Adjust the Frame Options
To access the Frame Options menu, tap a frame in the timeline, then tap it again. The menu will offer several key options:
- Hold Duration: Use the slider to set how long the current frame will hold before moving to the next. This creates a pause in the animation, allowing for specific moments to linger.
- Duplicate: Tap this option to duplicate the current frame and create an identical copy.
- Delete: Tap this option to remove the current frame from your animation.

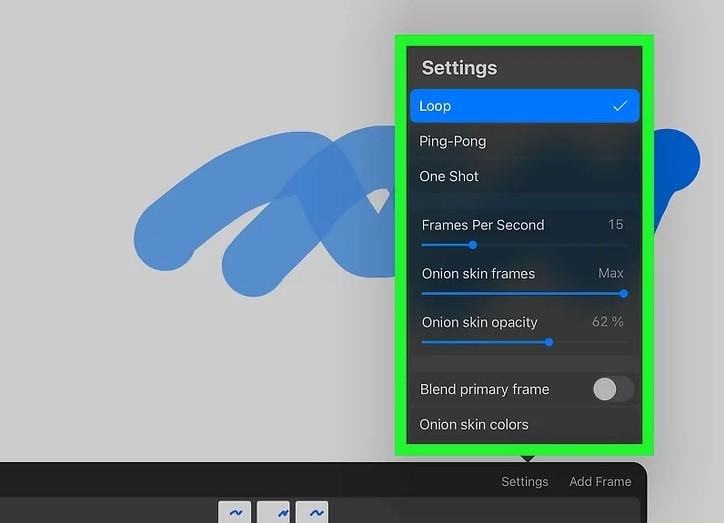
Step 2: Tap Settings
Next, tap the Settings icon located on the right side of the timeline, next to the Add Frame button. This opens the animation settings menu where you can make various adjustments.
Step 3: Edit Your Animation Settings
In the Settings menu, you’ll find multiple options for customizing your animation:
- Loop: If you want your animation to repeat continuously after reaching the last frame, tap this option.
- Ping-Pong: This option makes your animation reverse and play back in the opposite direction once it reaches the last frame, then repeat.
- One Shot: Select this option if you want your animation to stop once it reaches the final frame without looping.
- Frames Per Second (FPS): Use the slider to adjust the speed of your animation by changing the frames per second.
- Onion Skin Frames: Adjust the slider to control how many previous frames are visible as an onion skin when selecting a new frame.
- Onion Skin Opacity: Change the opacity of the onion skin to make previous frames more or less visible.
- Blend Primary Frame: This option allows you to dim the opacity of the current frame, making it blend more naturally with the surrounding frames.
- Onion Skin Colors: Tap this option to change the color of the onion skin. Use the color wheel to pick your desired color for the onion skins.
By adjusting these settings, you can control how your animation behaves, making it flow smoothly or adding specific pauses for dramatic effect.
References:
- Procreate’s Official Website: Procreate
- Full Animation Guide on Procreate: How to Animate in Procreate
Part3 Exporting the Animation
How to Export Your Animation from Procreate: A Step-by-Step Guide
Once you’ve completed your animation in Procreate, it’s time to export it in your preferred format. Here’s how you can do it.
Step 1: Tap the Wrench Icon
To begin, tap the wrench icon in the upper-left corner next to the “Gallery” label. This will open the Actions menu, where you can access various export options.
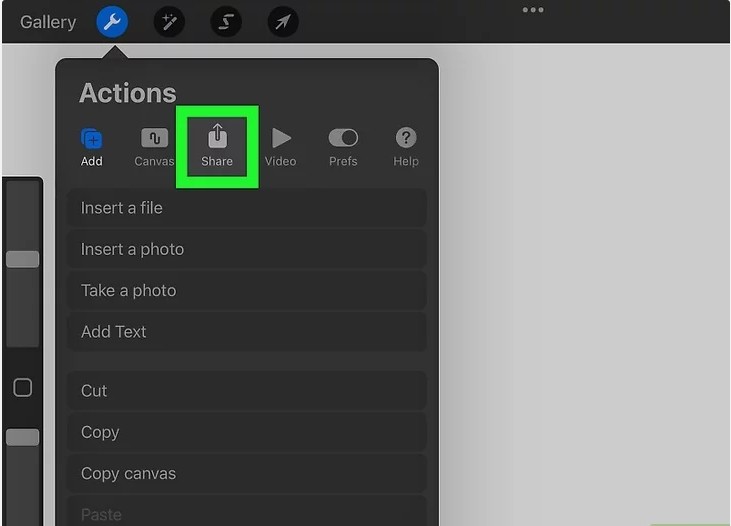
Step 2: Tap Share
In the Actions menu, tap Share. It’s the third tab at the top, and its icon resembles a square with an arrow pointing upwards. This will take you to the sharing options for your animation.
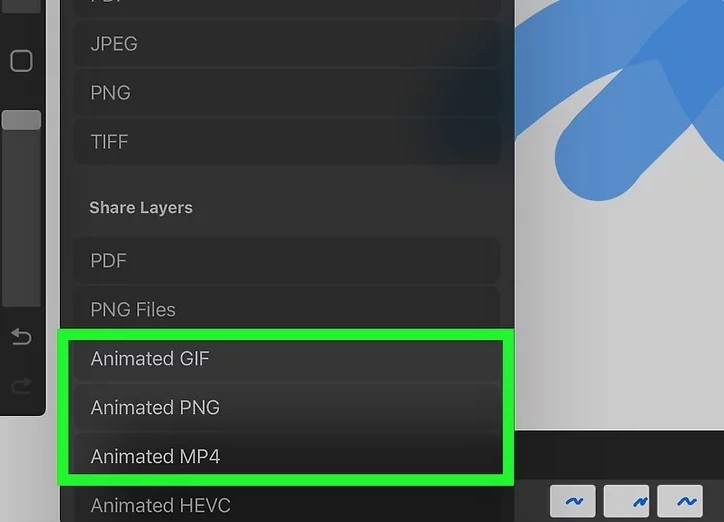
Step 3: Choose Your File Format
Scroll down and choose the file format in which you’d like to export your animation. You have the following options:
- Animated GIF: A common format for short animations. While GIFs are widely supported, they generally offer lower image quality.
- Animated PNG: A format similar to GIF, but with better image quality. However, it’s not as widely supported as GIFs.
- Animated MP4: The most commonly used video file format. This is ideal if you plan to upload your animation to platforms like YouTube.
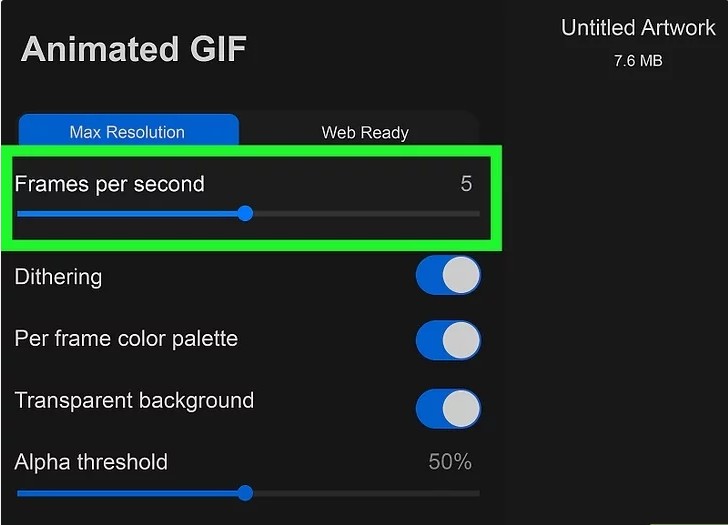
Step 4: Adjust the Speed
If you want to adjust the speed of your animation, use the Frames Per Second slider. By default, the animation will follow the frames-per-second speed you set in the Settings menu.
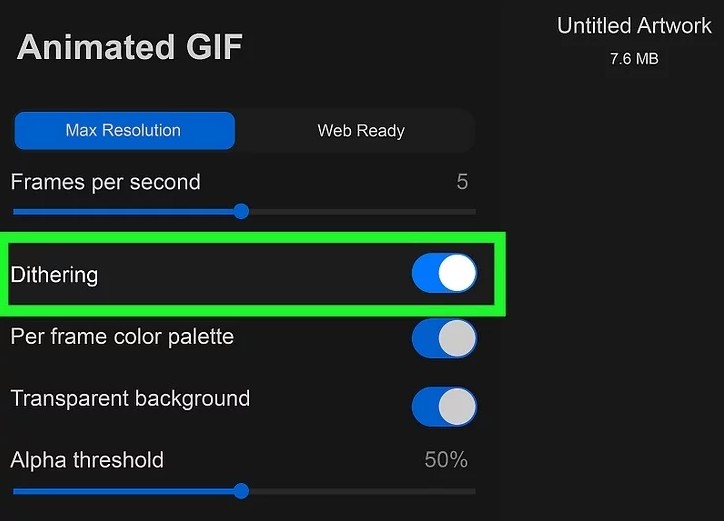
Step 5: Toggle Dithering On or Off
If you’re exporting your animation as a GIF and the format uses a limited color palette, you can toggle Dithering on. This helps blend pixels to simulate additional colors.
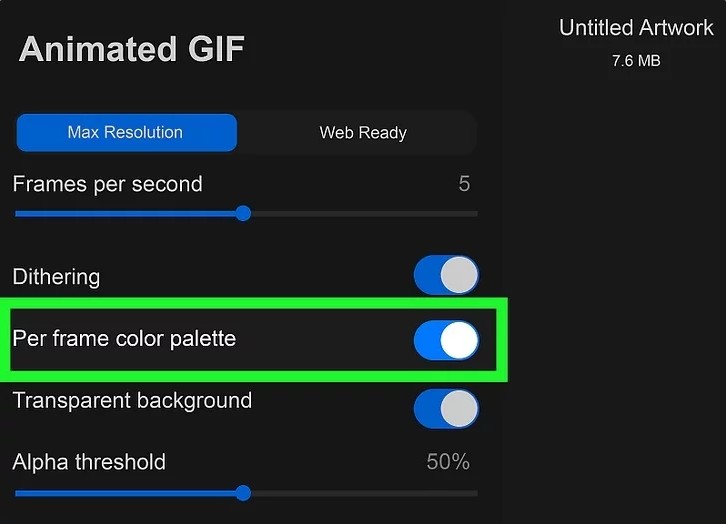
Step 6: Use Per-Frame Color Palettes
If you’d like each frame in your animation to have its own unique color palette, toggle the Per frame color palette option on.
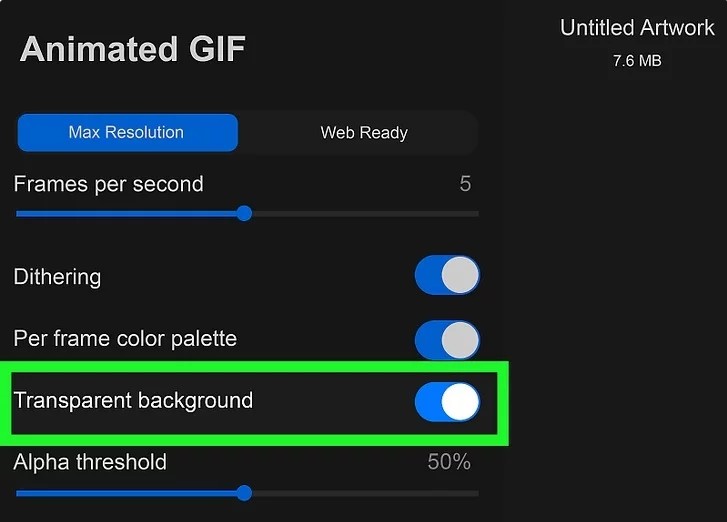
Step 7: Activate Transparent Backgrounds
For GIF and PNG formats, you can choose to have a transparent background instead of the default white. If you want this, simply toggle the Transparent Background option on.
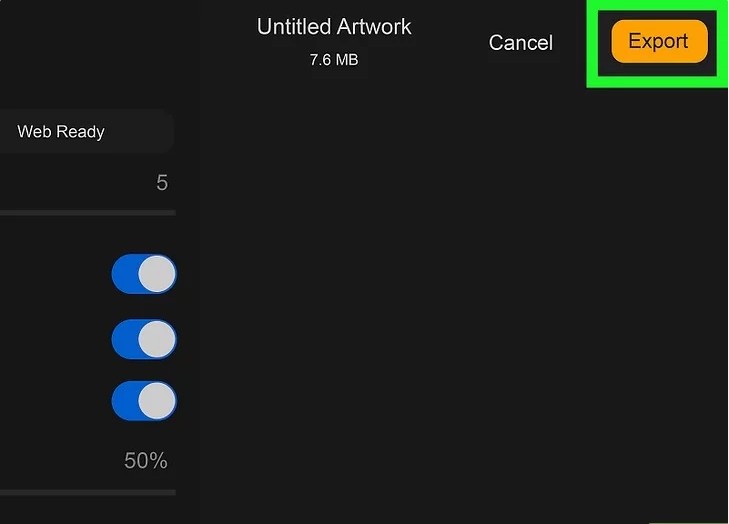
Step 8: Tap Export
Once you’re satisfied with your settings, tap the Export button (yellow button in the upper-right corner) to proceed with exporting your animation.

Step 9: Tap Save Image
Finally, tap Save Image to save your animation to your iPhone or iPad. You can find it in the Files app on your device for easy access.
References:
- Procreate Official Website: Procreate
- Full Animation Export Guide: How to Export Animation in Procreate