Microsoft releases Windows updates from time to time to resolve issues like security bugs, performance issues and also to add new features to the existing operating system. Usually these updates are meant to help Windows in the matter of stability, security and performance. But sometimes installing these updates can cause problems like random system crashes, blue screen of death, etc. For instance, recent Windows 7 security updates (2982791, 2975719, 2975331 and 2970228) caused random system crashes which in turn resulted in data loss and system files corruption. If you ever find yourselves in these kinds of situations, here is how you can uninstall a Windows Update to get your system back up and running.
Note: though I am showing the procedure in Windows 8.1, the same applies to Windows 7 and Vista.
Uninstall Windows Update
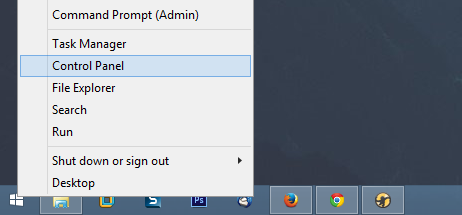
In Windows, uninstalling a Windows Update is just like uninstalling any other program or software. To do that, press “Win + X” to open the power user menu and select the option “Control Panel” from the list. If you are using Windows 7, you can search for it in the start menu.
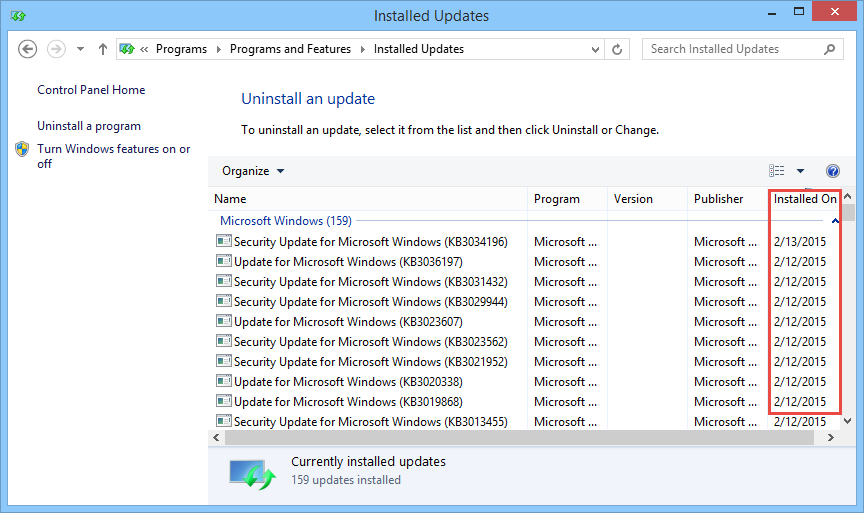
Here in the Control Panel, search for and double click on the “Programs and Features” link. This will open up the Programs and Features window listing all the programs installed on your computer. As we are going to uninstall a Windows update, click on the link “View Installed Updates” appearing in the left pane of the Window.

The above action will take you to the “Installed Updates” window where you can see all the installed Windows Updates along with the installation data and publisher information. By default, most recently installed updates will be on the top of the list.
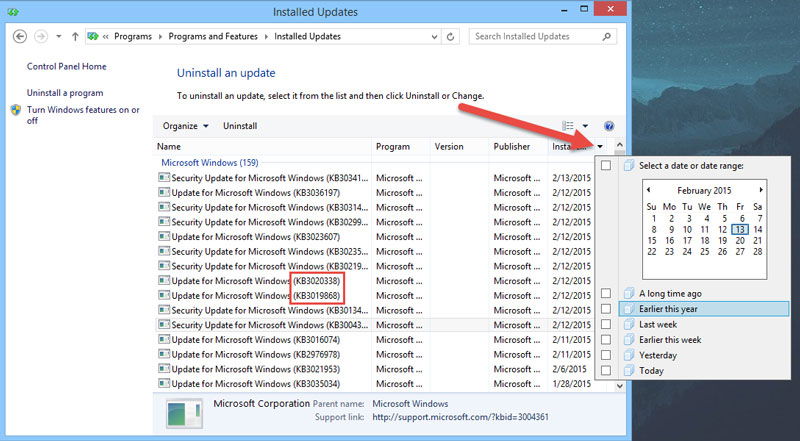
To uninstall an update, identify the update you want to uninstall. To do that, you can either use the Knowledge Base number which appears next to each of the updates or a specific time frame by clicking on that little down arrow icon appearing next to the “Installed On” option.
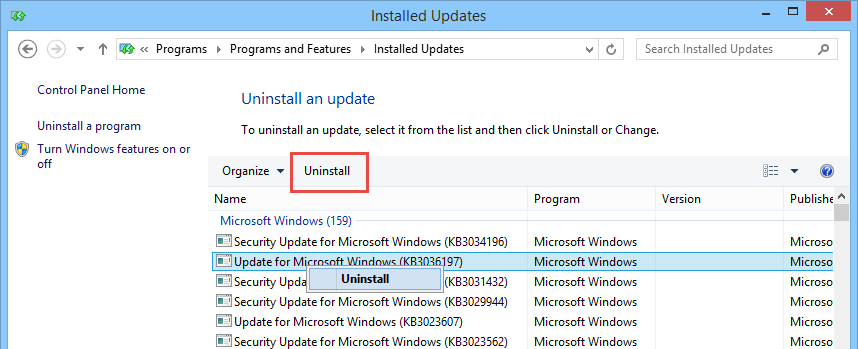
Once you have identified the entry, right click on it and select the option “Uninstall.” Alternatively, select the update and click on the button “Uninstall” appearing at the top of the window.
That’s all there is to do; you have successfully uninstalled a Windows Update. Just restart your system and you are good to go. That being said, if your computer is part of a network, then you may not be able to uninstall the Windows Updates as it is usually restricted by the Group Policy Rules placed by the network administrators. In those cases, you need to contact your network administrator to uninstall a Windows Update.
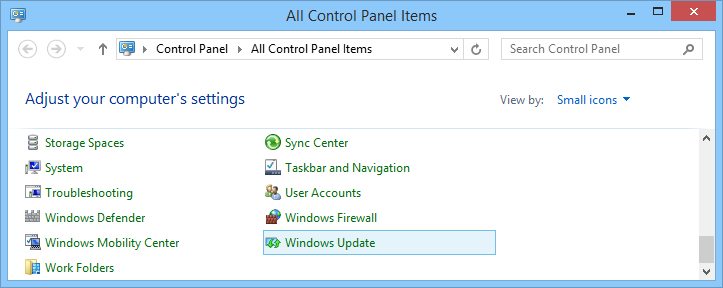
If you want to avoid future problems like this, you can disable the automatic installation of Windows Updates. To do that open up the Control Panel and click on the link “Windows Update.”
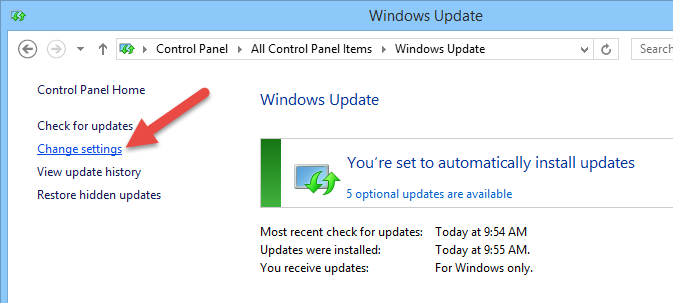
The above action will open the Windows Update window. Here click on the link “Change Settings” appearing in the left pane to open the Windows Update Settings window.
Here under the “Important Updates” section, select the option “Check for updates but let me choose whether to download and install them” from the dropdown menu and click on the “Ok” button to save the changes. This action ensures that Windows will notify you of the available updates, but you have to pick and choose the updates to download and install them.

Even though disabling automatic updates in Windows is fairly simple, only do it if you know what you are doing as ignoring the updates may result in system stability issues and an unpatched system.
Hopefully that helps, and do comment below sharing your thoughts on uninstalling the Windows updates and disabling automatic updates in Windows.

Vamsi is a tech and WordPress geek who enjoys writing how-to guides and messing with his computer and software in general. When not writing for MTE, he writes for he shares tips, tricks, and lifehacks on his own blog Stugon.
Subscribe to our newsletter!
Our latest tutorials delivered straight to your inbox
Sign up for all newsletters.
By signing up, you agree to our Privacy Policy and European users agree to the data transfer policy. We will not share your data and you can unsubscribe at any time. Subscribe