Back in Windows 7, Microsoft introduced all the features necessary to create and manage VHDs (Virtual Hard Disks) directly in Windows. A virtual hard disk is a simple container file that mimics the file structure and other elements of a physical hard disk drive. VHDs can be stored anywhere in your hard drive and are widely used by IT professionals in server environments. In fact, VHDs are typically used as hard disks for virtual machines and have many advantages over your typical partitions.
Advantages of Creating and Using VHDs
- Being simple container files, there is no need for you to actually partition your hard drive.
- VHDs allow you to create dynamic volumes so that you don’t have to allocate all the disk space at once. The VHD size will only increase as you add files or data to it.
- Since VHDs act as single files, they are easy to back up.
- You can create a dynamic VHD, install an operating system and dual boot it. Being dynamic, you don’t have to allocate a big chunk of space for the OS in your hard drive.
- When you are done with a VHD, you can simply delete the VHD container file to gain back your space. There is no need for complicated partitioning.
- VHDs are widely supported, which simply means that you can mount them as physical hard drives on Windows, Linux, and Mac.
- VHDs can even be accessed via local networks.
Creating a VHD in Windows
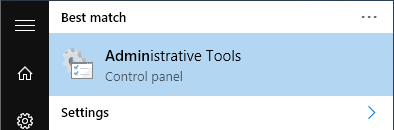
Creating a virtual hard disk in Windows is easy and straightforward. To start, search for “Administrative Tools” in the Start menu and open it.
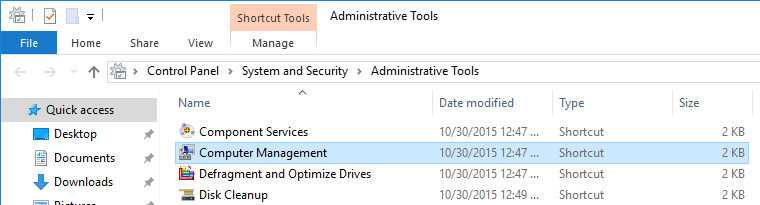
Once the Administrative Tools window has been opened, double-click on the “Computer Management” shortcut.
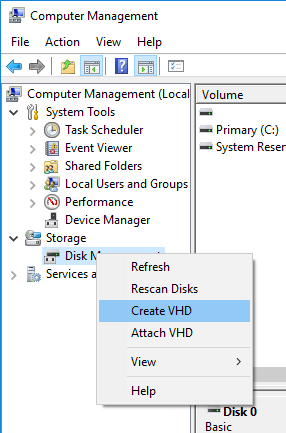
In the Computer Management window, select and right-click on the option “Disk Management” under “Storage” appearing on the left sidebar. From the context menu, select the option “Create VHD.”
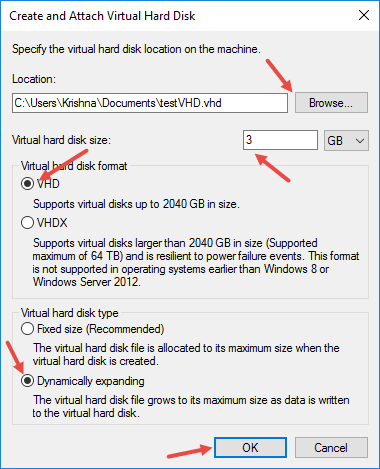
The above action will open the “Create and Attach VHD” window. Here, click on the “Browse” button, and select the location to store the VHD file. After that, select the size of your VHD either in MBs, GBs or TBs. In my case, I’m creating a VHD with 3 GB of space.
Use the default option for the VHD format. Select the VHD type by selecting either of the radio buttons’ “Fixed” or “Dynamic” size. In my case, I’m selecting the option “Dynamically expanding” so that I don’t have to allocate all the space at once.
Once you are done with everything, click on the OK button to save the changes.
With the above action, the virtual disk is listed in the disk management utility. Just right-click on the disk name and then select the option “Initialize.”

In the Initialize Disk window, leave the default options as they are and click on the “OK” button to continue.

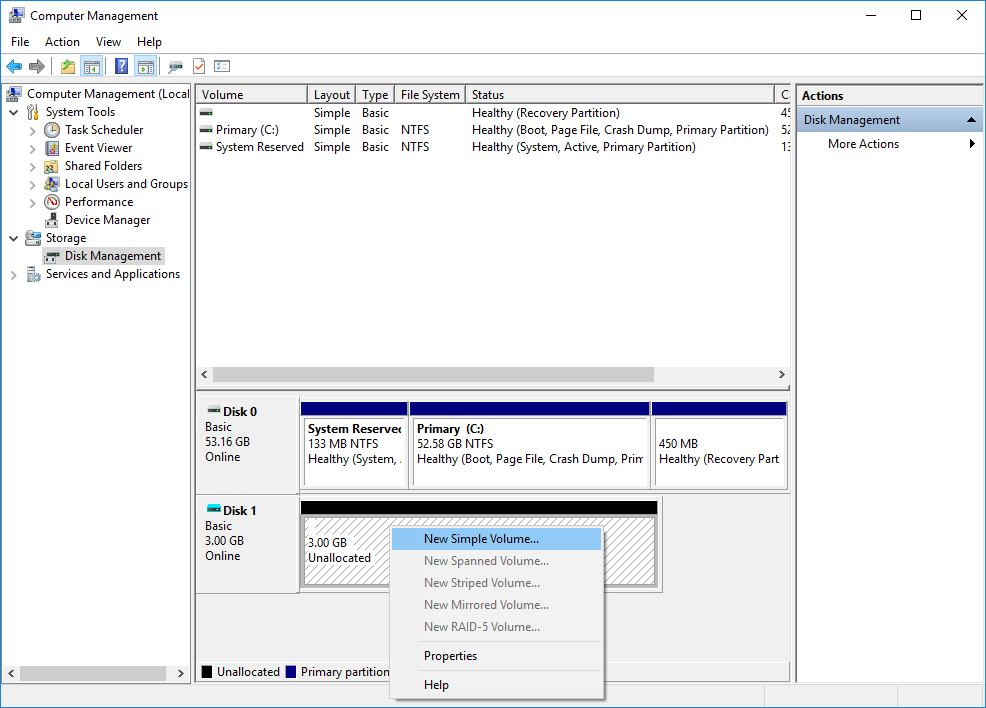
After initializing the disk, right-click on the disk and then select the option “New Simple Volume.”
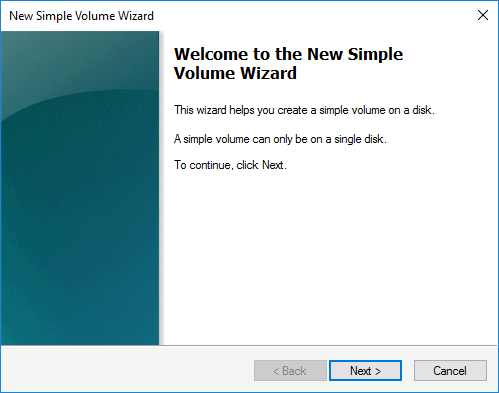
This action will open the Simple Volume Wizard. Just click on the “Next” button to continue.
Here in this window, select the size of the volume and click on the “Next” button.

Now assign the drive letter you want or let the defaults be and click on the “Next” button.

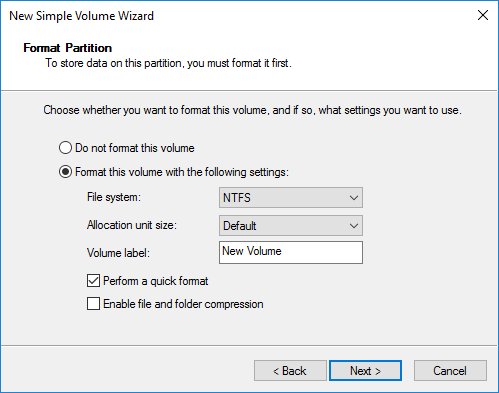
By default, Windows uses the NTFS file format to create the volume. Again, let the default be and click on the “Next” button.
The wizard will show you all the settings; review them and click on the “Finish” button to create the volume.

You’ve successfully created a VHD, and you can see that in the Disk Management utility.

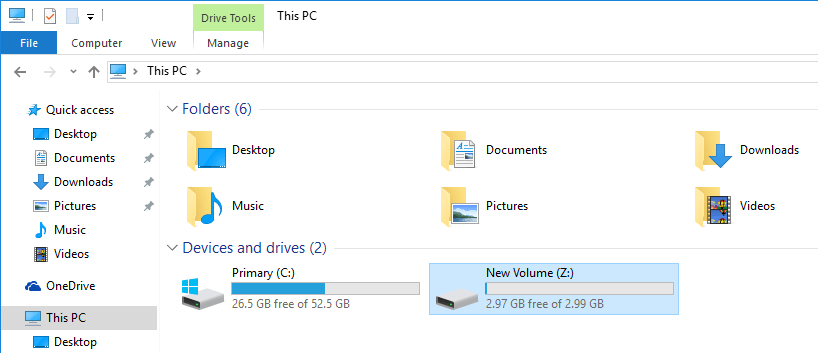
The good thing is that Windows automatically mounts the VHD as soon as it has been created. You can see the mounted drive in your file explorer.
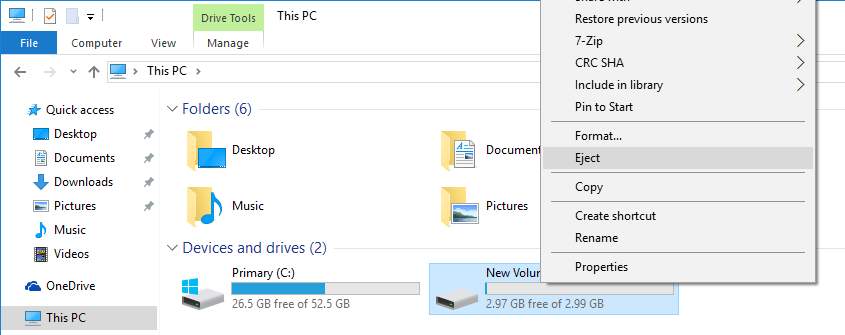
Once you are done working with the VHD, you can unmount it by right-clicking on it and selecting the option “Eject.”
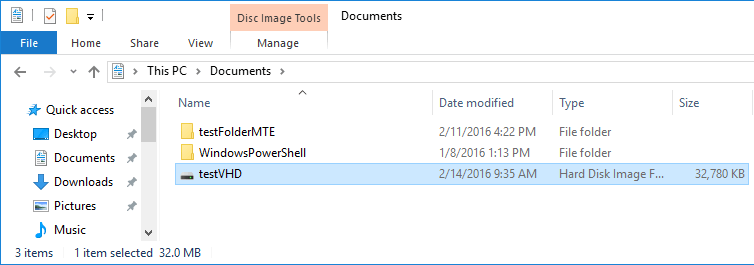
If you want to manually mount the VHD, then navigate to where you’ve stored the VHD container file and double click on it.
That’s it. It is that simple to create a VHD in Windows. Do comment below sharing your thoughts and experiences about creating and using VHDs in Windows.

Vamsi is a tech and WordPress geek who enjoys writing how-to guides and messing with his computer and software in general. When not writing for MTE, he writes for he shares tips, tricks, and lifehacks on his own blog Stugon.
Subscribe to our newsletter!
Our latest tutorials delivered straight to your inbox
Sign up for all newsletters.
By signing up, you agree to our Privacy Policy and European users agree to the data transfer policy. We will not share your data and you can unsubscribe at any time. Subscribe