How to Enable 3D Acceleration in VirtualBox: A Step-by-Step Guide
VirtualBox, a widely used open-source and cross-platform virtualization software, provides an excellent platform for running guest operating systems. While VirtualBox excels in versatility, its graphical performance was initially limited by basic 2D acceleration for most guest operating systems. However, VirtualBox now offers robust support for 3D acceleration, significantly improving the visual experience by enabling advanced graphical capabilities.

Enabling 3D acceleration in VirtualBox is crucial for users who wish to run graphically demanding applications or use visual desktop effects, such as Compiz on Linux or Aero on Windows. By utilizing the host system’s graphics hardware, VirtualBox can provide a more responsive and visually enhanced environment for the guest operating system.
This guide will walk you through the detailed steps required to enable 3D acceleration in VirtualBox and ensure optimal performance for your virtual machines (VMs).
Prerequisites for Enabling 3D Acceleration
Before proceeding with the setup, there are a few prerequisites to ensure that 3D acceleration works as expected:
- Host GPU Support: Your host machine must have a compatible GPU with 3D acceleration capabilities. If the host’s GPU does not support 3D, VirtualBox will not be able to enable this feature for the virtual machine.
- Guest Operating System: Make sure that the guest operating system you are using supports 3D acceleration. For example, some Linux distributions or older Windows versions may not support advanced graphical effects without additional configurations.
- VirtualBox Version: Ensure that you are using VirtualBox 2.2 or later, as earlier versions did not support full 3D acceleration for all guest systems.
Step-by-Step Guide to Enabling 3D Acceleration in VirtualBox
- Create a New Virtual Machine
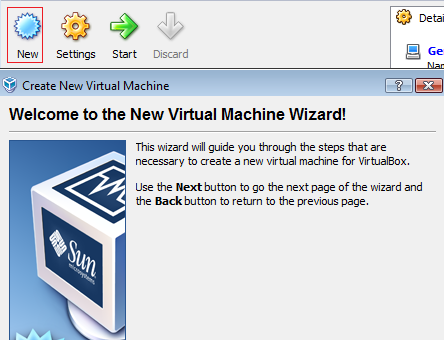
- Open VirtualBox and click on the New button to create a new virtual machine.
- Select the operating system you wish to install (e.g., Ubuntu, Windows, etc.).
- Follow the standard process to allocate memory, create a virtual hard drive, and configure the VM.
- Install the Operating System
- Begin the installation of your chosen guest operating system. In our example, we are using Ubuntu.
- After the installation is complete, make sure that the guest OS is fully up-to-date and configured for regular use.
- Access the VM Settings
- Select your newly created virtual machine from the main VirtualBox window.
- Click on the Settings button to open the VM configuration window.
- Enable 3D Acceleration
- In the Settings window, navigate to the Display section.
- Click on the Screen tab, where you’ll find a setting for Video Memory. Allocate the maximum video memory available (e.g., 128 MB) to enhance graphics performance.
- Under the Acceleration section, check the box labeled Enable 3D Acceleration. This option will allow the virtual machine to access 3D graphics capabilities using your host machine’s GPU.
- Click OK to save the changes.
- Install VirtualBox Guest Additions
- For optimal 3D acceleration performance, you need to install VirtualBox Guest Additions inside the guest operating system.
- Start the virtual machine and log into the guest OS.
- In the VirtualBox menu, go to Devices → Insert Guest Additions CD Image.
- Follow the on-screen instructions to install the Guest Additions, which include the necessary drivers for enhanced graphics performance, including support for 3D acceleration.
- After the installation is complete, restart the virtual machine.
- Verify 3D Acceleration
- After rebooting the guest OS, you can verify that 3D acceleration is working correctly.
- On Linux, you can use tools like glxinfo to check the availability of hardware-accelerated OpenGL. On Windows, you can verify the functionality through the display settings.
- For Linux-based systems, open a terminal and run the command
glxinfo | grep "direct rendering". If 3D acceleration is enabled, the output should indicate that direct rendering is Yes.
Troubleshooting Common Issues
- No 3D Acceleration: If 3D acceleration is not working, ensure that the host machine’s graphics drivers are up to date and support OpenGL 3.3 or later. Additionally, confirm that the guest OS has the appropriate drivers installed (e.g., VirtualBox Guest Additions).
- Performance Issues: If you experience slow performance, try increasing the allocated video memory under the Display settings or tweaking other resource allocations, such as CPU and RAM.
- Compatibility Problems: Some older guest operating systems may not fully support 3D acceleration. In such cases, consider updating to a newer version of the operating system or using a different graphics environment.
Conclusion
Enabling 3D acceleration in VirtualBox unlocks enhanced graphical performance for your virtual machines, allowing for better visual effects and smoother operations when running graphics-intensive applications. By following the detailed steps outlined in this guide, you can enable 3D acceleration, ensure the proper installation of Guest Additions, and troubleshoot common issues to optimize your virtual machine’s graphical capabilities.
With 3D acceleration enabled, your VirtualBox experience will be significantly more immersive and capable of handling modern graphical interfaces with ease.