When it comes to calendars, there is no denying that Google Calendar is one of the best. In fact, many individuals and small businesses depend on Google Calendar to manage their schedules and appointments. If you are an avid Windows user, you might want to sync the Google Calendar with your system. Thanks to Windows 10, you can now do it with just a couple of clicks.
For those of you who don’t know, when Microsoft first introduced the Calendar app in Windows 8, it supported Google Calendar. Due to some ongoing battle between Microsoft and Google, users were stripped of this feature in Windows 8.1. Since Microsoft has started to listen to its users, the feature is back, and you can now sync your Google Calendar with the Windows 10 Calendar app.
Also read: How to Set Up Reminders in Windows
Add Google Calendar to Windows 10 Calendar App
To add Google Calendar to Windows 10 Calendar app, search for the pre-installed Calendar app in the Start menu and open it.

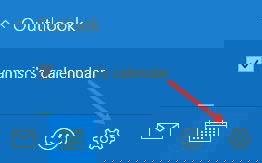
Once the Calendar app has been opened, click on the Settings icon appearing on the bottom left-side.
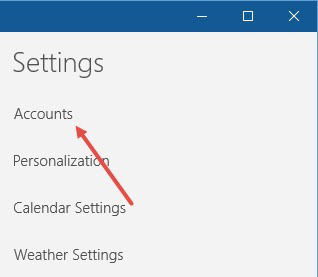
The above action will bring forward the settings panel. Here, select the “Accounts” option.
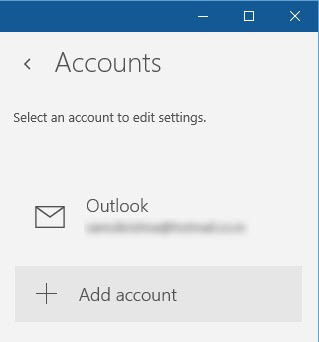
In the next screen select the option “Add account.” If you’ve linked your Microsoft account, then that account will be displayed here by default.
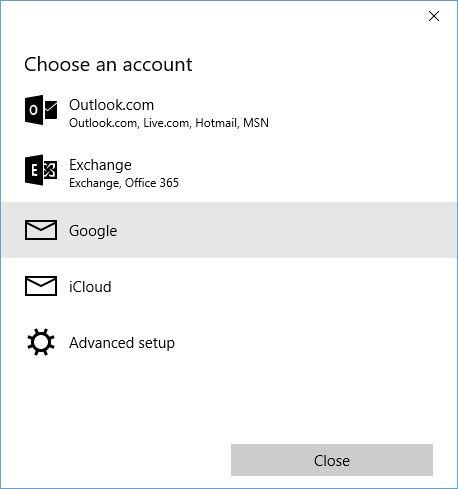
Now choose “Google” from the list of available options.
The above action will take you to the “Connecting to a Service” screen. Just sign in with your Google account’s username and password.
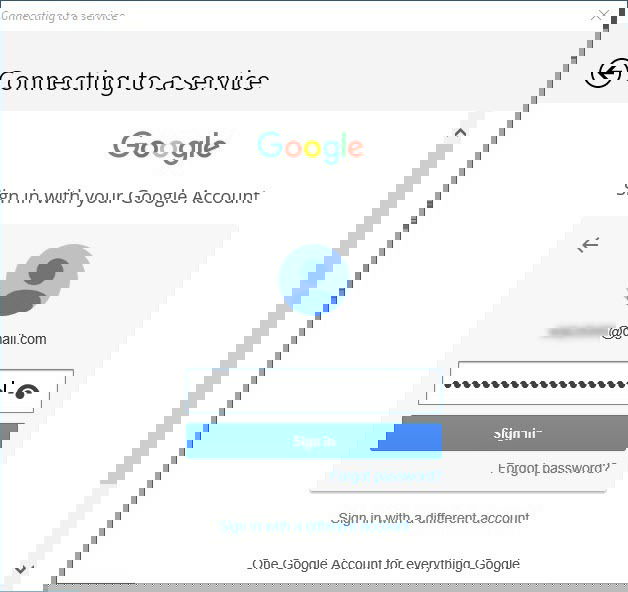
If you are using two-step authentication, which is always recommended, then also enter the verification code and click on the “Done” button.

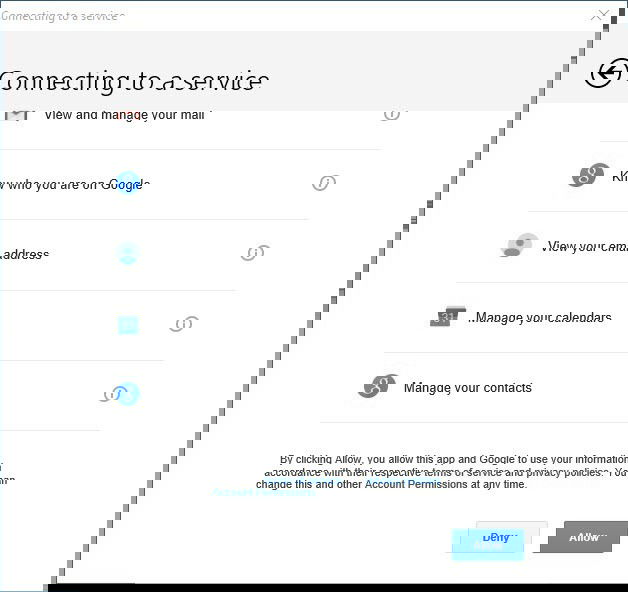
Now you will be taken to the Google Consent screen. You should grant the Calendar app certain permissions. Simply scroll down and then click on “Allow” to continue.
If everything goes well, you will receive a success message like this.

Customizing and Testing Synchronization
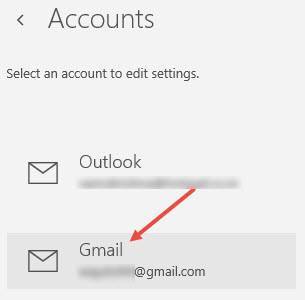
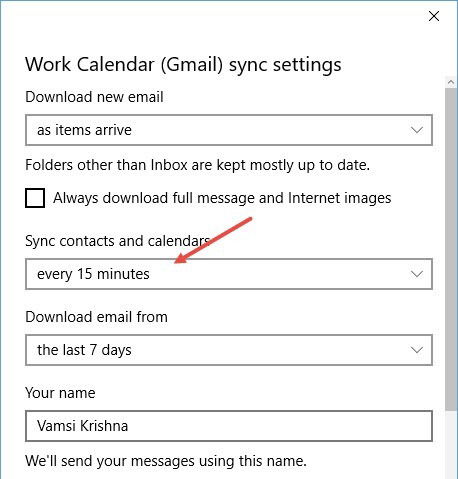
If you want to you can customize the synchronization options from the account settings panel. To do that, click on the settings icon, select the option “Accounts” and then select “Gmail.”
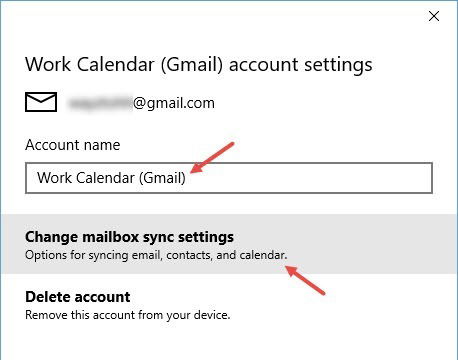
As you can see from the below image, you can easily change your Google account name. As for me, I named my account “Work Calendar” for demo purposes. To manage the Sync settings select the option “Change mailbox sync settings.”
In case you are confused, the sync settings for Mail and Calendar can be configured from the same panel.
In the settings panel, make sure that the option “Sync contacts and calendars” is set to “Every 15 minutes.” This ensures that the Calendar app communicates and updates itself every 15 minutes.
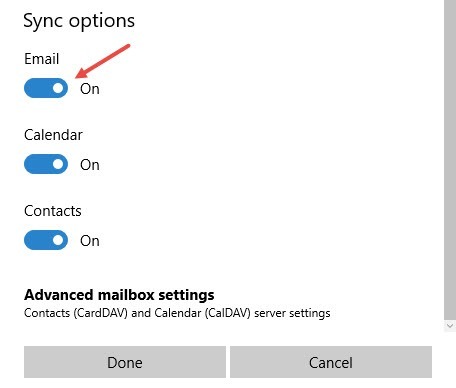
On the other hand, if you only want to sync your calendar and not the mail, then scroll down and toggle the option “Email” under the Sync Options category. Once you are done with the changes, click on “Done” and you are good to go.
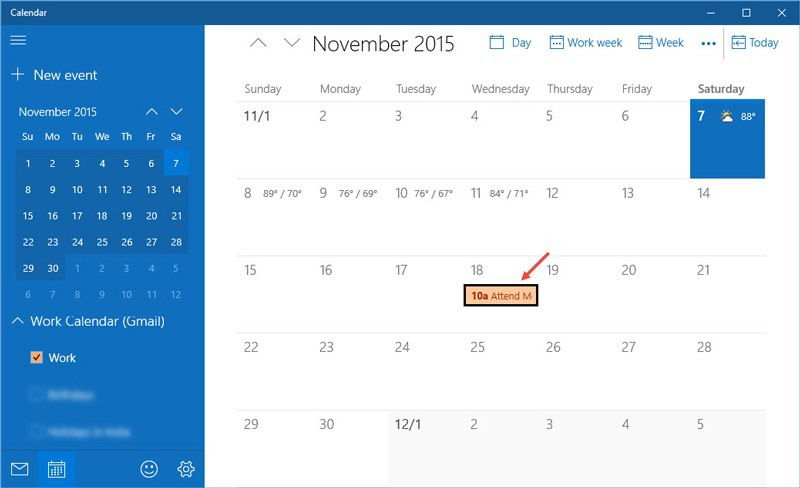
One thing to keep in mind while adding events to the Calendar app is that you need to manually select the calendar. Let me show you how.
For instance, I want to create a new event on 18th Nov, 2015. To create a new event, select the 18th November. This action displays an event creation pane. Enter the details as required, and just before you save the changes, select the appropriate calendar from the drop-down menu. In my case, I’ve selected the “Work” calendar in my Google Calendar account.
Note: you can add, delete, and manage your calendars in the Google Calendar

The above action creates the new event in your calendar.
Depending on your Sync settings, the event will be synced with your Google Calendar so that you can access it even on other devices.
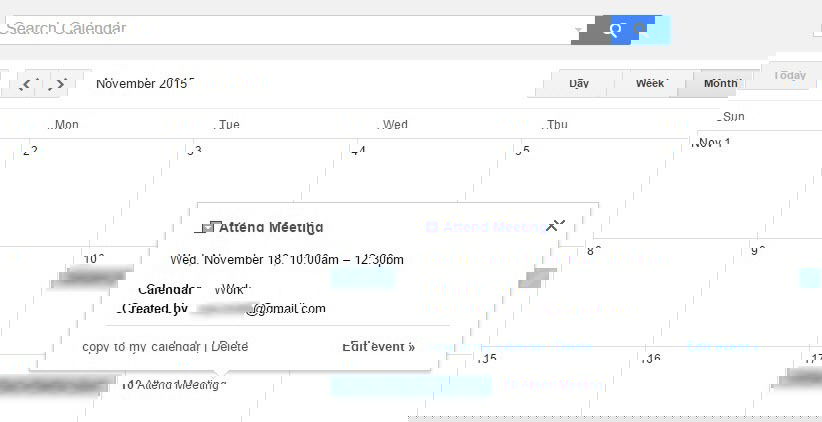
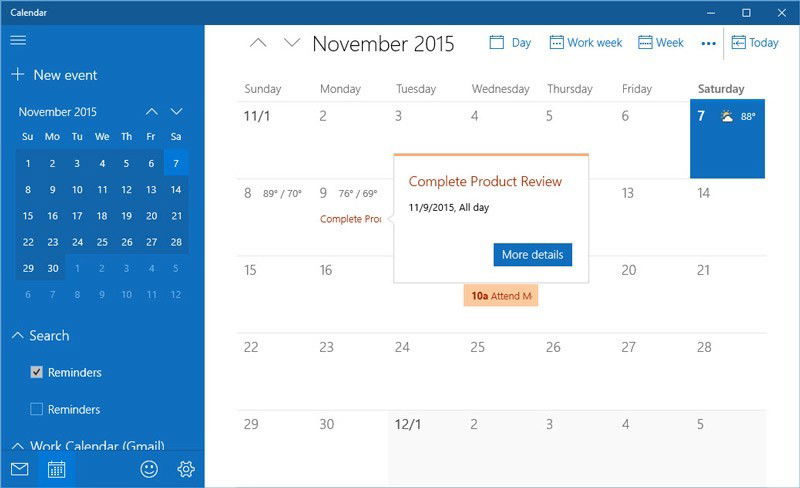
To further test the synchronization, I’ve created a new event in Google Calendar.
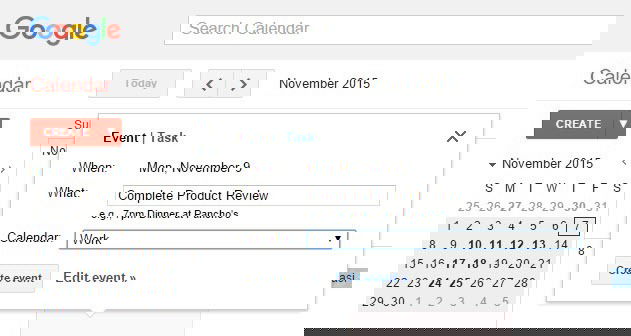
As you can see from the below image, the event created in the Google Calendar has been successfully synced with the Calendar app in Windows 10.
Do comment below sharing your thoughts and experiences about synchronizing Google Calendar with the default Calendar app in Windows 10.

Vamsi is a tech and WordPress geek who enjoys writing how-to guides and messing with his computer and software in general. When not writing for MTE, he writes for he shares tips, tricks, and lifehacks on his own blog Stugon.
Subscribe to our newsletter!
Our latest tutorials delivered straight to your inbox
Sign up for all newsletters.
By signing up, you agree to our Privacy Policy and European users agree to the data transfer policy. We will not share your data and you can unsubscribe at any time. Subscribe