
How to Turn Your DVD/CD Library Into a Digital Library. As technology continues to evolve, many of us are faced with the challenge of outdated physical collections like CDs and DVDs, which no longer align with our increasingly mobile and cloud-based lifestyles. With devices such as netbooks, ultrabooks, and even some desktops abandoning optical drives, the shift is undeniable. A single DVD case, once the size of a portable media player, now seems unnecessarily large compared to a microSD card capable of holding a stack of CDs.
If you’re wondering how to turn your DVD/CD library into a digital library, this guide will walk you through the process. By digitizing your music and movies, you’ll not only free up physical space but also make your collection more portable and easier to access. From choosing the right software to understanding file formats, we’ll explore how to transform your DVDs and CDs into a convenient, digital format that you can enjoy anytime, anywhere.
To begin, you’ll need a few tools to help with this transition. How to turn your DVD/CD library into a digital library requires ripping software that can convert the data on your discs into digital files. Once you have the software, the process is straightforward and customizable to meet your preferences, whether it’s for archiving or creating a library you can stream from any device.
Once your collection is digitized, you’ll be able to store it in the cloud, making it accessible from multiple devices and ensuring you never lose a favorite song or movie again. So, if you’re ready to say goodbye to physical discs, let’s dive into how to turn your DVD/CD library into a digital library and unlock the full potential of your collection.
1. Rip Music from CDs
Ripping music CDs to a digital format is not a new concept. In fact, most default music players already offer this functionality. Here’s how to rip your CDs:
Windows
- Windows Media Player: Simply insert the CD, and the software will prompt you to rip the music. Select the tracks you want and choose your preferred audio format (MP3 is a popular choice).
Mac
- iTunes: Insert the CD, and iTunes will automatically display the track list. You can then choose to import the songs into your iTunes library in the format you prefer.
Linux
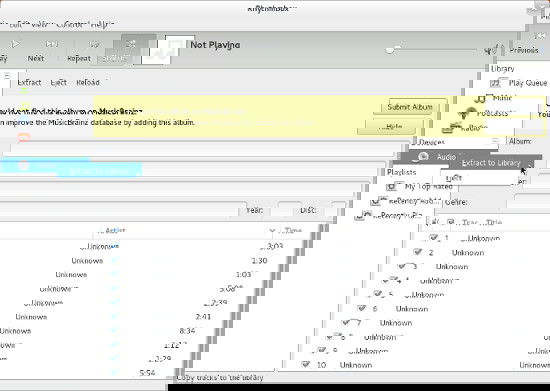
- Rhythmbox: This is my default media player on Linux. When you insert a CD, it shows up in the sidebar, and you can click “Extract” to transfer the music to your computer.
For more details on the best CD ripping software, check out this guide on CD ripping tools.
2. Rip DVDs
If you’re looking to watch your favorite DVD on a portable media player or stream it from your computer to your TV, ripping the DVD is necessary. Here’s how to do it:
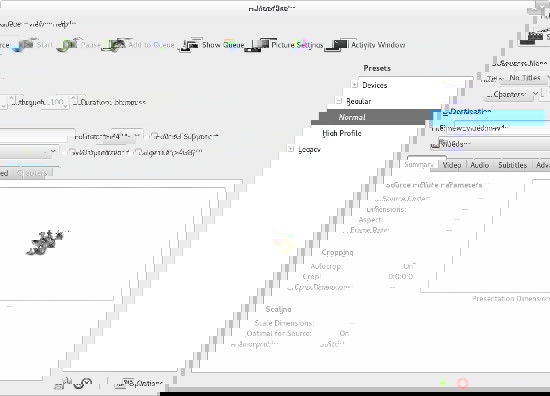
HandBrake (Free & Cross-Platform)
HandBrake is a free, open-source tool available for Windows, Mac, and Linux that can rip DVDs and convert them into digital files.
- Download HandBrake: Visit HandBrake’s website and download the appropriate version for your system.
- Select DVD: Open HandBrake, insert your DVD, and select it as the source.
- Choose Format: Select the output format (MP4 is recommended for most devices) and adjust the settings as needed.
- Rip the DVD: Click “Start Encode” to begin the ripping process.
For more information on HandBrake settings, visit their official user guide.
3. View Files on Your Computer
Once your media is on your computer, you can enjoy it with any compatible media player such as:
- Windows Media Player (Windows)
- iTunes (Mac & Windows)
- VLC Media Player (Cross-platform)
If you want to transfer the files to a portable device, the process may vary depending on your device’s interface:
- MTP (Media Transfer Protocol): Devices like iPhones require iTunes to manage media.
- MSC (Mass Storage Class): Devices like Android phones may allow simple drag-and-drop transfers, similar to using a USB flash drive.
4. Stream Your Media
Rather than storing all your media directly on your phone or tablet, streaming from a central location can save you space. Here are some popular software options for streaming your media:
- Subsonic: A free, full-featured, cross-platform streaming solution.
- PS3 Media Server: Ideal for streaming to various devices, including PS3 and other media players.
- Amahi Home Server: For those wanting to set up a home server to manage and stream their media.
For more info on media streaming, check out Subsonic’s streaming setup guide.
5. Use Cloud Players for Music
If your media collection mainly consists of music, storing it in the cloud can free up local storage while providing access to your library from any device. Some top cloud music players include:
- Google Music: Offers up to 20,000 songs for free storage.
- iCloud (Apple): Store music on Apple’s cloud for easy access.
- Amazon Cloud Player: Another option for storing your music online.
For more options, check out this comparison of cloud music services.
6. Organize Your Digital Library
Once your music and movies are transferred to digital format, organizing them becomes essential. Use software like:
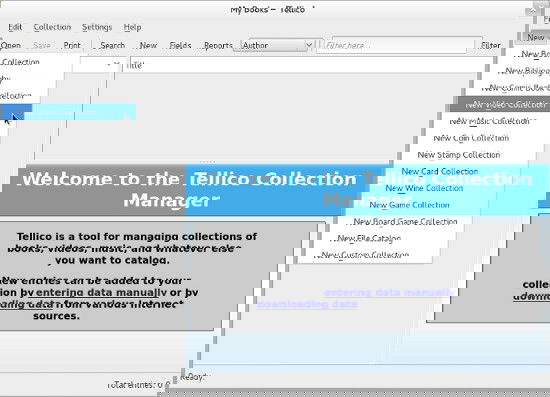
- Tellico Collection Manager: Helps you organize and catalog your media, including movies, music, and even eBooks.
For a complete tutorial on how to use Tellico, visit Tellico’s official page.
Conclusion
Digitizing your media collection not only frees up physical space but also gives you the freedom to access your music and movies anywhere. While digital versions are available for purchase, ripping your own DVDs and CDs ensures that you have control over your content and format preferences. HandBrake, iTunes, and cloud services like Google Music are just a few tools that will help you transition into a digital media world.
For a deeper dive into digital media management, check out this comprehensive guide on managing media files.