With hard disks getting bigger these days, most people opt to partition their hard disks so they can easily store their personal files in another partition. However, slicing, resizing and modifying current structure of a hard disk in Windows is never an easy task, but thanks to the tools like Magic Partition Resizer, anyone can now organize their hard disk without any data loss or other hiccups.
We have a giveaway for IM Magic Partition Resizer. Read on for more details.
Installation and User Interface
IM – Magic Partition Resizer is a professional partitioning tool which is specifically designed to manage your hard disk partitions. The installation process is simple, and you can install it like any other regular Windows software. Once installed, you can launch it and start working as the Magic Partition Resizer doesn’t require any restart of your Windows system.
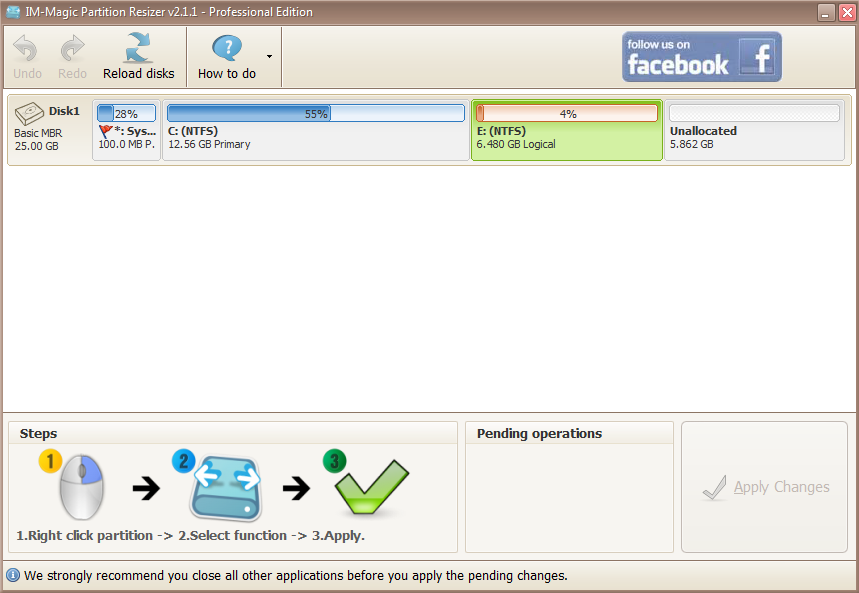
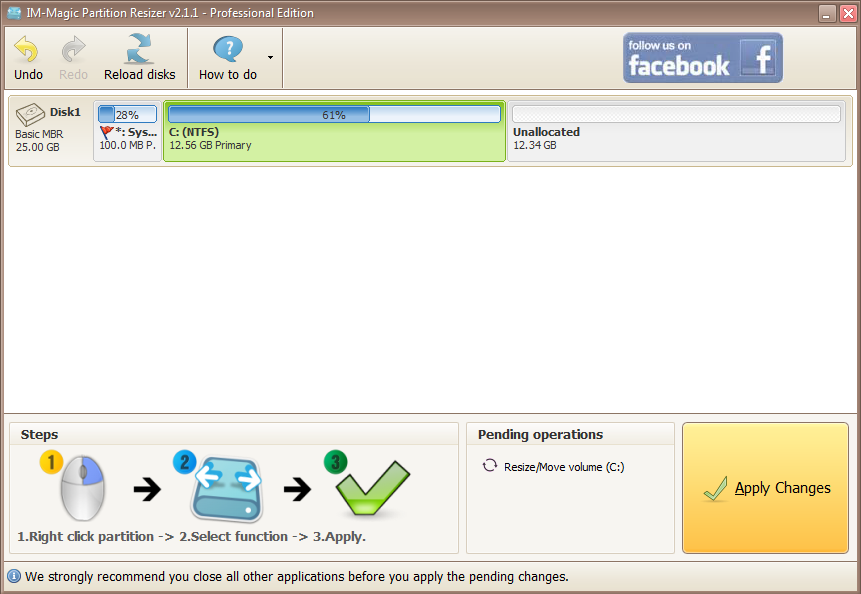
As you can see from the above screenshot, the user interface itself is clean and minimal. The dashboard lists all the available logical and primary partitions along with any unallocated space. It also displays other useful meta information like total space, file system type, remaining space, etc.
Resize Existing Partition
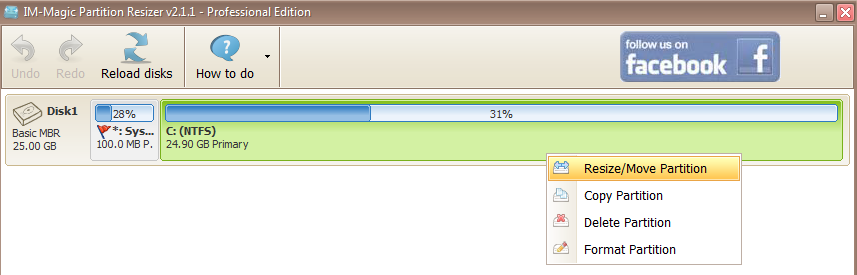
Resizing a partition with Magic Partition Resizer is really easy. Just select the drive you want to resize and right click to select “Resize/Move Partition.”
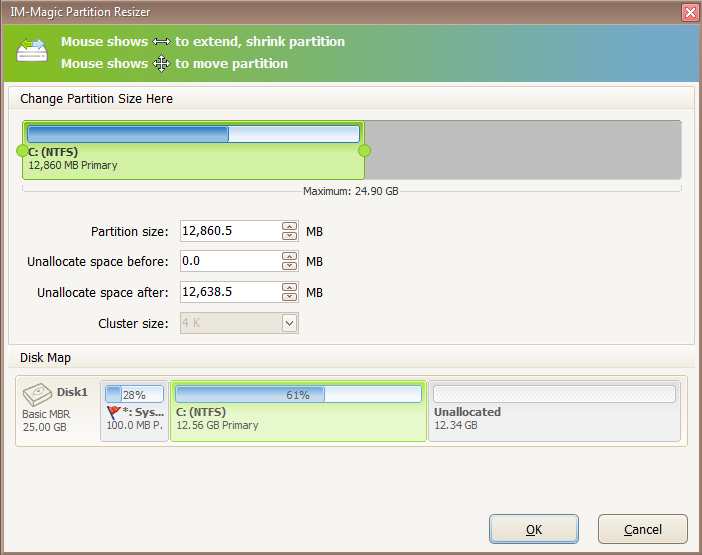
The above action will open a “Partition Resizer” window where you can resize your Windows partitions by sliding the edges of the graphical representation, or you can enter the values for precise resizing. Once you are done changing the partition size, click on the “Ok” button to continue.
Here in this screen, preview the changes you just made and click on the “Apply” button located at the bottom right corner. You may receive a couple of confirmation messages; read and accept them to resize the partition you have selected. Also, this process requires your system to be restarted, so save all your work and close all the applications before applying the changes.
Once everything is done, you can see the changed partition size in the Windows explorer and you can also see that resized space as unallocated space in Magic Partition Resizer. This unallocated space can either be used to increase another partition’s size or to create a new partition. To create a new partition, you can follow the steps below.
Create a New Partition
To create a new partition, you need unallocated space before hand. Magic Partition Resizer will show you if there is any unallocated space. To create a new partition, just right click on the unallocated space and select “Create Partition” option.

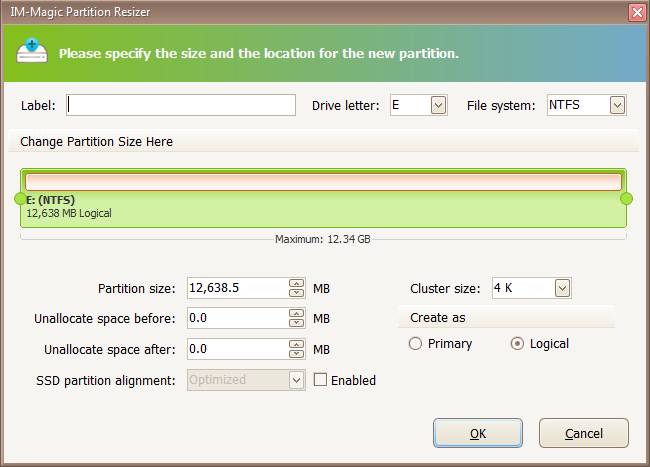
The above action will open another window where you can set the size of the new partition using the slides or the actual values. Set the partition size and click on the “Ok” button to continue. Note that you can also set other settings like drive letter, drive file system, etc.
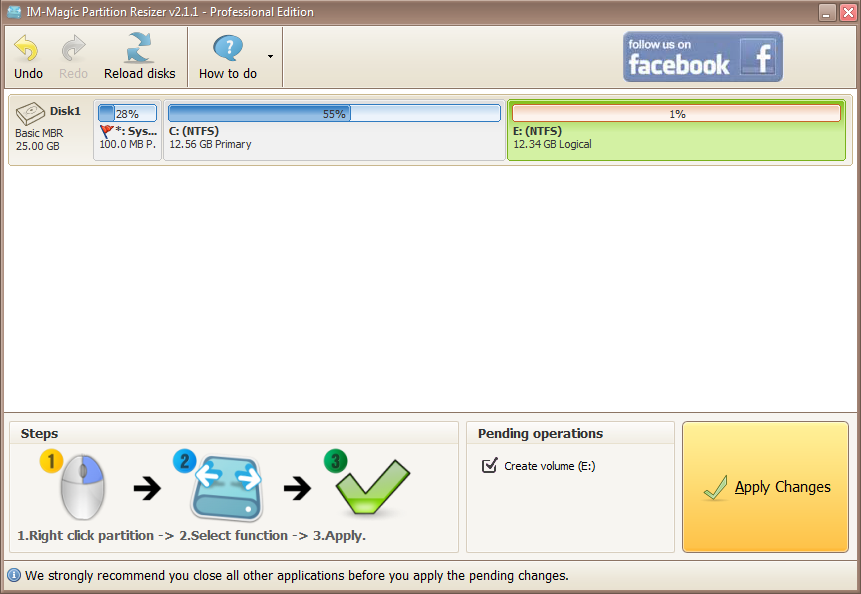
Preview the changes you just made, and click on the “Apply” button to apply the changes.
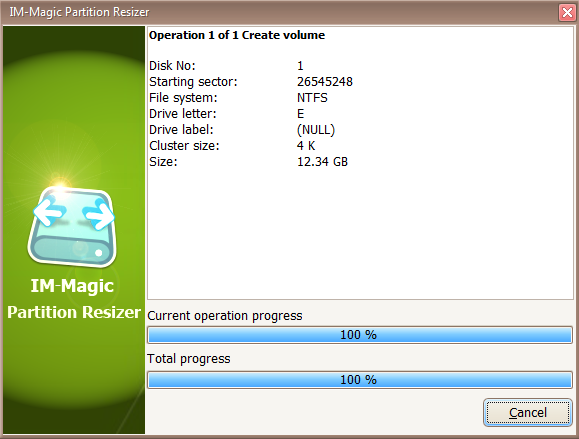
As soon as you click on the “Apply” button, Magic Partition Resizer will create a new drive using the unallocated space. The time to complete the process depends on the size of the partition, so be patient while your partition is being created. Also, this process doesn’t require you to restart your Windows machine.
Once the process is completed, you can see the changes in Magic Partition Resizer or in the Windows explorer. From this point forward, you can start using that drive like any other drive in your Windows PC.

That’s all there is to do to resize or create a partition in your Windows PC using Magic Partition Resizer. It is also capable of formatting, deleting, copying, and moving partitions.
Overall, Magic Partition Resizer is a handy tool for Windows partition management with beginner friendly user interface. Besides its simple looks, the developers also provide their users with handy how-to guides in their support center on how to manage Windows partitions.
IM-Magic Partition Resizer Professional

Vamsi is a tech and WordPress geek who enjoys writing how-to guides and messing with his computer and software in general. When not writing for MTE, he writes for he shares tips, tricks, and lifehacks on his own blog Stugon.
Subscribe to our newsletter!
Our latest tutorials delivered straight to your inbox
Sign up for all newsletters.
By signing up, you agree to our Privacy Policy and European users agree to the data transfer policy. We will not share your data and you can unsubscribe at any time. Subscribe